Open topic with navigation
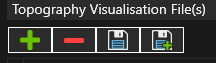
Topography and aerials
-
Green + to add a topography.
-
Red - to remove a selected topography.
-
Save to save configuration.
-
Save + to save configuration and add a new topography.
A topographic surface must be imported before a site can be active. The surface sets the starting position of the face positions and more than one surface file can be loaded for a site.
- Click the Edit site topography, aerial and pit limit files icon
 .
.
- Click Add
 to add a new Topography File.
- Once the file is selected a new row is created with the default configuration settings, the data can be saved as is or additional configuration options defined (see below).
- To change the topographic file, click the ellipsis button in the Wireframe Topography File column.
For the topographical file, select a triangulation file from the following formats:
- AutoCAD DXF (*.dxf)
- Carlson Grid (*.grd)
- CSV Grid (*.csv)
- Datamine Grid (*.dat)
- Datamine Triangulation File (*tr.dm)
- Draco Compressed Triangulation (*.drc)
- Glb File (*.glb)
- GLTF File (*.gltf)
- MineScape Grid (*.dmp)
- Minex Binary Grid (*.GRID)
- Minex Triangulation (*.tr5)
- RPM Extended File (*.rpmx)
- Stereolithography Binary Tri-surface (*.stl)
- Surfer Grid (*.grd)
- Surpac DTM file (*.dtm)
- Vulcan Binary Tri-surface (*.00t)
- Vulcan Grid (*.map; *.??a); *.??g)
- Well Known File (*.wkt; *.wkb; *.ewkt; *.ewkb)
- [Optional] Import an Aerial image to be draped over the topographical surface to provide enhanced visuals by clicking the ellipsis button in the Aerial Image column.
- For the aerial image, the following formats are supported:
- jpg, jpeg
- .ecw
- .png
- .bmp
- .gif
- .tiff
World files for image spatial registration are also supported for all formats (*.[extension]w) except .ecw to allow import of georeferenced images. Any associated World file will automatically be loaded when the main image file is selected.
- Select the Simplification level (default = Very Low) to be applied to the topographical file. Higher simplification levels reduce triangle count and data storage size.
- [Optional] Set the Spatial Domain for the topographical data. The Spatial Domain can also be set from the Spatial Domain menu item.
- Click Save.
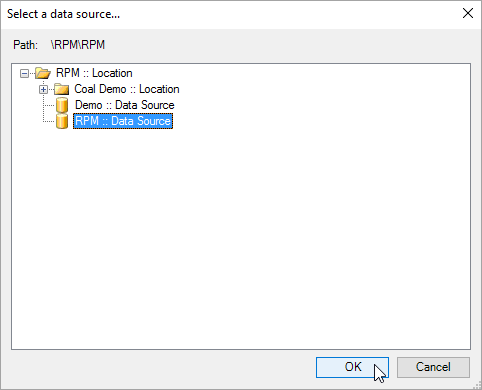
- Select the model repository data source where the files will be stored.
-
After files are imported, the row background changes to green and the Status message is updated. The topographical file and the image can now be checked for alignment.
If a World file was used the alignment should not need adjustment.
- To align the image to the topo click the small checkered icon to the right of the status column.
The topo and aerial display side-by-side, with blue, red and green symbols on each.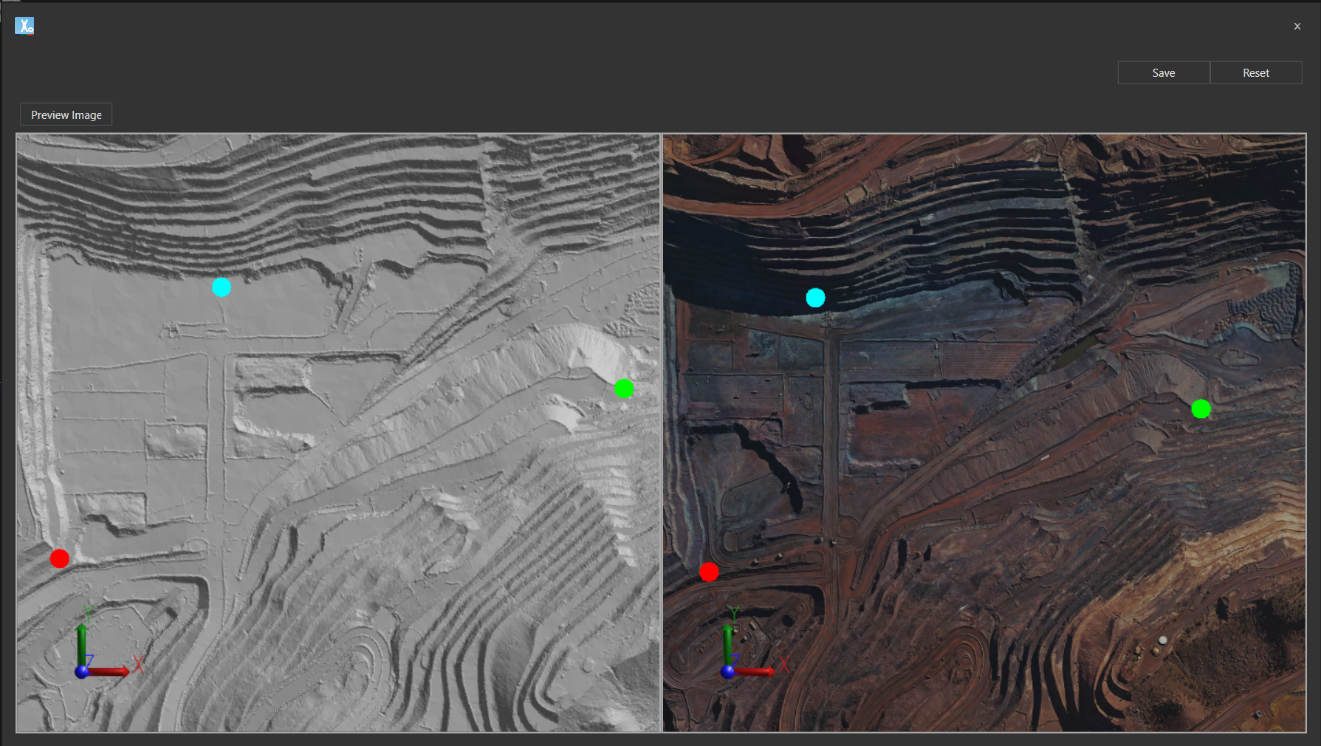
-
Align the image to the topo by identifying and placing points on prominent landmarks. Features such as major intersections and ponds are easiest to identify and use for alignment.
-
In the upper left a Preview Image button is available to check the results before clicking the Save button to save Alignment settings.
Online updates
You can update the topography, aerial and pit limits when the site is running. At least one topography must be loaded during the update operation.
Allowed operations include:
- Delete existing topography and aerial image.
- Edit an existing aerial image.
- Add a new topography surface.
- Change the alignment of aerial topography.
- Replace the topography and aerial image.
- Delete pit limit.
- Add pit limit.
- Change pit limit colour.